Forms Reference
Forms
Written By Luke Wakefield
Last updated 10 months ago
Reference
Including a Form
{% include 'form', id: '1', layout: 'default' %}
The id refers to the specific form you wish to output.
Layout refers to either the:
The default layout which is created automatically by the system - this should not be edited directly as every time you modify the form fields, the default layout will automatically be updated. Any changes you make using CLI will be overwritten.
A custom layout allows you to decide which fields to output and how. You can fully customise it. In the parameter, you should include the file name with no extension, and any subfolders relative to the folder form_1 where the number matches the form ID.
Often you can save time by starting with a default layout and copying it to build your custom layout.
If you output two forms with the same ID, but different layouts, they may display different fields and look visually different, but they would use the same settings and their cases will be stored in the same database table.
Form Custom Layouts
The Form Tag
Every Form should contain the `{% form %} {% endform %}` opening and closing tags where the HTML form element's closing tags would normally go. These will output the HTML tag along with important, hidden system fields.
Learn more including how to pass HTML ID and class attributes:
https://documentation.platformos.com/api-reference/liquid/platformos-tags#form
Submitting a Form
<button type="button" onClick="s_form_submit_v2(this,'form_1', function(errors) {
  //On Error
},function(redirect) {
  //On Success
})">Submit</button>
Parameters:
1st - Button - DOM Element (required)
1st - Button - DOM Element (required)
A reference to the button element which should be a child of the Form which will be submitted
2nd - Form ID - String (required)
2nd - Form ID - String (required)
A reference to the Form ID in Siteglide
3rd - Error Callback - function (optional)
3rd - Error Callback - function (optional)
A callback function to be called when form client-side validation fails.
Default behaviour will show a JS Alert with the first error.
One parameter is passed containing an array of errors.
Learn more: Forms Error Callback and Validation
4th - Success Callback - function (optional)
4th - Success Callback - function (optional)
A callback function to be called when form client-side is successful.
Default behaviour will redirect the Page to the value of the s_redirect input or if not present, the redirect setting in the Siteglide Admin.
One parameter is passed containing the redirect URL.
Learn more: Forms Success Callback
The form's HTML attributes will change during each step of the form submit process:
form_x_submittingclass will be added for the duration of the submissiondata-s-form-progress="1"data-attribute will be added and it's value changed at each submission step
File Upload Previews
<img data-file-preview="form_field_11_1_file" height="100" width="100" />OR for background images:
<div data-file-preview="form_field_11_1_file"></div>Custom Field Sets
For each type of field, you will need to use a slightly different syntax to include a Custom Field Set field in a Form Layout.
When it comes to adding the data-cfsHTML attribute, the first number should be the CFS ID and the second number the CFS Field ID. Finally, the type should be specified and preceded by the string "input_".
E.g. data-cfs="5-1-input_text"
If you're not sure where to find these, see:
Steps to Using Custom Field Set fields in a Form's Custom Layout
Text
A text input should have the data-cfs attribute inside the <input> element.
<input
  class="form-control"
  name="{{ form_builder.fields.properties.form_field_13_1.name }}"
  data-cfs="5-1-input_text"
  type="text"
/>
Textarea
The same applies for textarea inputs.
Checkbox
A Checkbox group should have the data-cfs attribute on the container for the entire group. <input> elements should be the grandchildren of this group.
<div class="checkbox-container" data-cfs="6-1-input_checkbox">
  <div class="checkbox">
    <input
      id="form_field_13_3_Rare"
      name="{{ form_builder.fields.properties.form_field_13_3.name }}[]"
      type="checkbox"
      value="Rare"
    />
    <label for="form_field_13_3_Rare">Rare</label>
  </div>
  <div class="checkbox">
    <input
      id="form_field_13_3_medium"
      name="{{ form_builder.fields.properties.form_field_13_3.name }}[]"
      type="checkbox"
      value="Medium"
    />
    <label for="form_field_13_3_medium">Medium</label>
  </div>
</div>
Radio
The same applies to a radio field.
<div class="radio-container" data-cfs="5-3-input_radio">
  <div class="radio">
    <input
      id="form_field_14_3_radio_1"
      name="{{ form_builder.fields.properties.form_field_14_3.name }}"
      type="radio"
      value="Radio 1"
    />
    <label for="form_field_14_3_radio_1">Radio 1</label>
  </div>
  <div class="radio">
    <input
      id="form_field_14_3_radio_2"
      name="{{ form_builder.fields.properties.form_field_14_3.name }}"
      type="radio"
      value="Radio 2"
    />
    <label for="form_field_14_3_radio_2">Radio 2</label>
  </div>
</div>
Dropdown
The data-cfs attribute should go on the <select> element itself, not on <option>s.
<select
  class=""
  name="{{ form_builder.fields.properties.form_field_14_5.name }}"
  data-cfs="5-5-select"
>
  <option value="Dropdown 1">Dropdown 1</option>
  <option value="Dropdown 2">Dropdown 2</option>
</select>
File
The data-cfs attribute is on the hidden field, not on the element with type="file".
<label for="form_field_14_6">File</label>
<input
    class="form-control"
    name="{{ form_builder.fields.properties.form_field_14_6.name }}"
    data-cfs="5-6-file"
    type="hidden"
>
<input
    class="form-control"
    id="form_field_14_6_file"
    type="file"
>
Spam Protection
Read more about spam protection: Explained - Preventing Spam Form Submissions and Captchas
Double check: It’s important that you use the correct spam protection code for the method of spam protection selected for your form. Look in CMS/forms, then edit the form you’re interested in and check the “Spam Protection” tab:
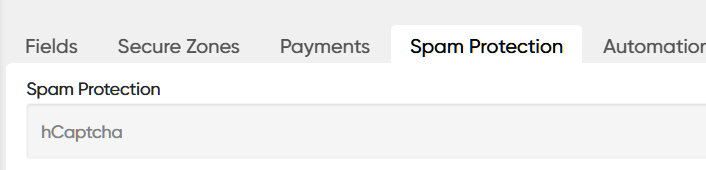
hcaptcha (recommended)
The following Liquid code outputs the hcaptcha challenge box onto the form layout. It also includes additional code to make the challenge box semi-responsive on smaller screen sizes.
{% assign html_attrs = '{}' | parse_json %}
{% if context.device.device_type != "desktop" %}
  {% hash_assign html_attrs['data-size'] = 'compact' %}
{% endif %}
{% spam_protection 'hcaptcha', html_attributes: html_attrs %}
Google recaptcha (not recommended)
The following code will either output a challenge box or silently analyse submissions, depending on which version you select. The code is the same for both versions.
This solution is not recommended because our experience is that depending on settings it either has more false-positives or false-negatives than hcaptcha.
{% include 'recaptcha' -%}Was this helpful?
Still need help? Ask the team